We use cookies to make your experience better. To comply with the new e-Privacy directive, we need to ask for your consent to set the cookies. Learn more.

How to Generate a Flood Depth Raster
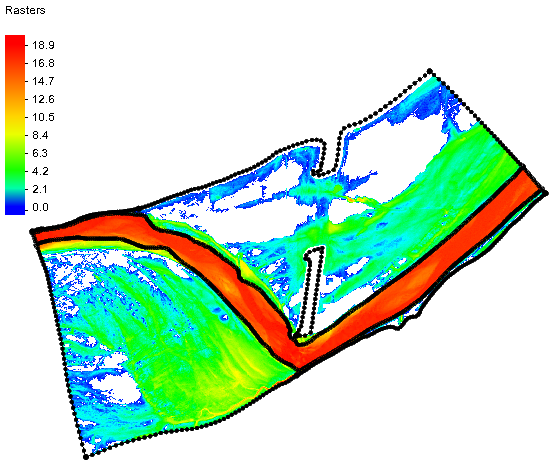
After running your model, such as SRH-2D, you will have a water surface elevation (WSE) dataset. Did you know that, starting in SMS 13.0, you can use the WSE dataset to create a raster showing the flood depths?
SMS can create a flood depth raster by using the WSE solution dataset at a specific time step and comparing it to the initial elevation data. Using both of these datasets, it can then generate a raster that shows the flooded areas for a specific time step.
In order to create a flood depth raster your project will need a WSE solution dataset and an elevation raster. Once you have a raster:
- Select the desired time step for your WSE solution dataset.
- Right-click on the raster and select Convert To | Flood Depths.
- In the Select Geometry and Dataset dialog, select a geometry containing your WSE solution dataset. The selected geometry can be either a 2D mesh or a 2D scatter set.
- Next select the WSE solution dataset.
- Click OK to close the Select Geometry and Dataset dialog, which will launch the Save As dialog.
- Creating a name for your raster and click Save. (Note that the file should be saved as a "GeoTIFF Files (*.tif)".
- Hide the mesh and elevation raster to be able to view your new flood depth raster.
It should be noted that it may take a few minutes for the flood depth raster to be generated depending on the available processing power of your machine. Since a raster file is saved during the process, the file is available for use in other applications if desired. Coordinate data is saved with the file.
Now that you know to create flood depth rasters, try using them in your SRH-2D projects in SMS.
August 7, 2019
|
View: 2430
|
Categories: SMS
|
By: <a class="mp-info" href="https://aquaveo.com/blog/author/admin">Aquaveo Staff</a>
About the Author

Performing a Silent Install of XMS (Passwords & Hardware Locks)
October 10, 2018
Computing Basin Curve Numbers in 9 Easy Steps
May 16, 2023
Converting a NET File to an INP File
May 9, 2018
Performing a Silent Install for ALS
October 27, 2021
Tips for Finding Information on the XMS Wiki
September 25, 2019
Managing MODFLOW 6 Data: Lists, Copy Period & CSVs
April 21, 2026
5 Concepts for Mastering Surface-water Modeling
April 14, 2026
Comparing Multiple Design Alternatives in One Project
April 7, 2026
Incorporating MODFLOW 6 Groundwater Energy (GWE)
March 31, 2026
Essential DEM Clean-Up for Watershed Delineation
March 24, 2026