Aquaveo & Water Resources Engineering News

Importing Older Projects into GMS

Do you have an older GMS project that you need to open in the current version of GMS? Maybe you want to bring an older project into a newer version of GMS so you can make use of new features that have been added to GMS. Working with older projects can sometimes be tricky. Older versions of GMS are no longer supported and will break down over time. This article will explain more about why this happens and what can be done to get your older projects into a current version of GMS.

Generally speaking, GMS rarely has problems opening projects that are only a few years old. For example, the current version of GMS is version 10.5. Projects created in versions as far back as GMS 10.0 or 10.1 are likely to open without any issues For projects that are older, for example, projects that were created more than ten years ago, some issues may occur.

Over time, changes to the GMS interface, changes to the Windows operating system, and other factors may cause your project to not open in a current version of GMS. Also, how the data files were stored may cause the data to be unreadable.

When you have an older project that has failed to import into GMS, you can try a couple methods to get it into the current version of GMS.
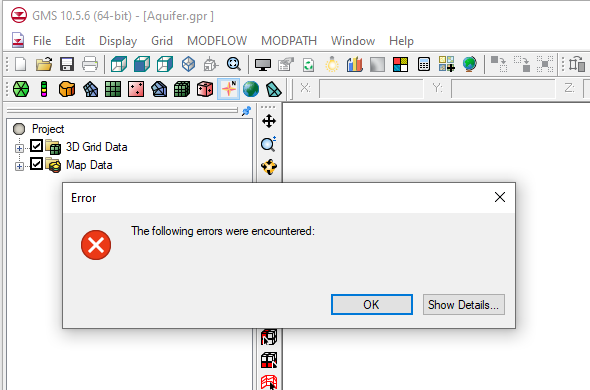
Error opening an older project in GMS 10.5

The first method is to migrate the project through different GMS versions. This is done by opening the project through consecutively more recent versions of GMS. For example, if your project was originally built in GMS 8.1 and does not open in GMS 10.5, you could start by opening the project in GMS 9.0, and then saving the project if it imports correctly. After this, try opening the project in GMS 10.0 and saving the project again. Finally, see if the project opens in GMS 10.5 and save it. While doing this stepping process, review the project to make certain it remained intact. Some corrections are likely needed because of how the migration process functions.

Aquaveo’s technical support team can help you obtain older versions of the software if you have a current license.

The second method is to rebuild the project in the current version of GMS using files from the original project. For MODFLOW projects, this is done by importing the native MODFLOW files. GMS can also read the MODFLOW files that are exported by GMS. You also may need to import individual files, such as the map files or grid files. Using this method you may not get everything out of the older project, but should be able to obtain enough to create a complete, working project.

If you need additional help with importing an older project into the current version of GMS or any of our software, contact our consulting team for assistance.
Blog tags: 

Using the Time Series Editor

Do you have an older text file that is in a format that isn’t quite right for your project? Reformatting an older file can be time consuming. Using a time series editor or similar tool can make reformatting the text easier. Provided with WMS is the Time Series Data Editor application.

Using the Time Series Data Editor allows you to reformat files that are not correctly formatted. To do this, the application provides a number of tools. First off, the application can be used for both time series data and XY series data. Once the time series or XY series data file has been imported into the Time Series Data Editor, the application allows you to adjust how the text file is formatted.

For example, perhaps the text file has been formatted using a time stamp where the date is written without a space between the day, month, and year making all three a single column. The Time Series Data Editor allows you to separate out this date format into separate columns

When importing the files into the Time Series Data Editor application, you can select to import using a fixed width or using a delimiter such as a tab or space.

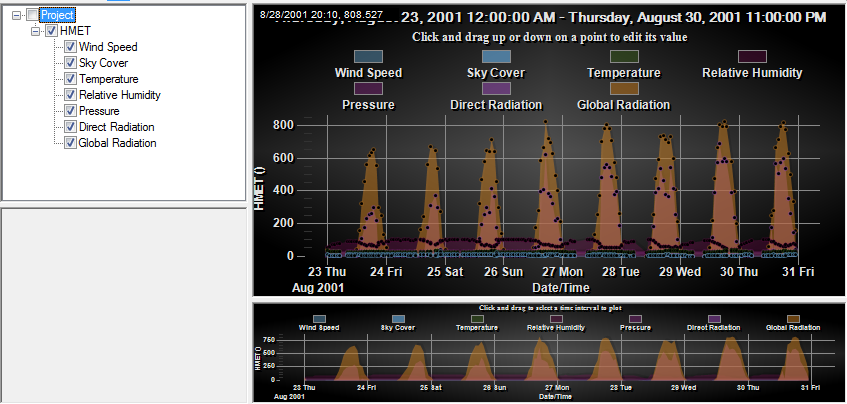
Once you've imported your data, the Time Series Data Editor will display a graph of the data. From here, if necessary, you can make adjustments to individual points in the data.

Time Series Data Editor example

The Time Series Data Editor also allows you to generate either time series or XY series data from scratch.

After you are satisfied with how the data appears, the Time Series Data Editor allows you to export the data into a number of different formats.

While the Time Series Data Editor is packaged with WMS, it can also prove useful for data that needs to be formatted for GMS, SMS, or other applications. Download the Time Series Data Editor with WMS today!

Blog tags: 

New Project Explorer Commands for SMS 13.1

With the release of SMS 13.1, you might have noticed a few new commands in the Project Explorer right-click menus. The Project Explorer, or data tree, in SMS contains a list of modules and objects that have either been imported into the project or created in the project. Right-clicking on any of these objects will produce a number of commands to perform specific functions or launch certain tools.

Over the development of SMS, the number and type of commands in the Project Explorer have fluctuated. Changes are made to enhance the use of SMS. With SMS 13.1, new commands can be found when clicking on the Project icon at the top of the Project Explorer.

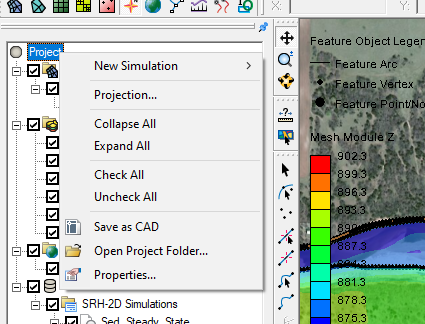
Project Explorer Right-Click Menu for Projects

In this new right-click menu, you will find several commands that have become common in other Project Explorer right-click menus. These include a New Simulation sub-menu and a Projections command. The Projections command will open the Display Projections dialog to set the projections for the entire project. There is also an Open Project Folder command that will open a file explorer window to show the location of the saved project. A Properties command has been added to see details about the project, and contains a place to make notes about the overall project.

These commands also include collapsing or expanding all of the objects in the project. For the Project menu, this would collapse all of the items so only the Project icon is shown, or expand the data tree to show all objects in the project. There are also commands to toggle off or on all data in the project.

Finally, there is a new command, the Save as CAD command. This command will allow you to save a CAD file that contains CAD data generated from all visible data in the Graphics Window.

The new right-click menu commands give you more options for working with data in the Project Explorer. Try this out in SMS 13.1 today!

Blog tags: 

Importing a Shapefile to the DRN Package

Do you have drainage data in a shapefile that you would like to import into GMS to use for the drainage package in your MODFLOW project? Shapefiles are capable of holding a variety of information, including drainage data and other data used by MODFLOW. And a lot of software are capable of converting parts of a MODFLOW project into a shapefile.

If you have a shapefile with drainage data, it can be used for the DRN package in your MODFLOW simulation. This is done by using the following workflow:

  1. Use any of the methods to open a file to import your shapefile into your GMS project.
  2. One the shapefile has been imported into the GIS module, check to see if the conductivity values for the drains were imported with the shapefile. In most cases, this will happen automatically.
  3. In your MODFLOW conceptual model, create a map coverage with the drain option turned on in the coverage setup.
  4. Back in the GIS module, use the GIS | Shape > Feature Object command to open the GIS to Feature Objects wizard.
  5. In the first step of the wizard, make certain the drain coverage is selected and the correct shapefile is selected.
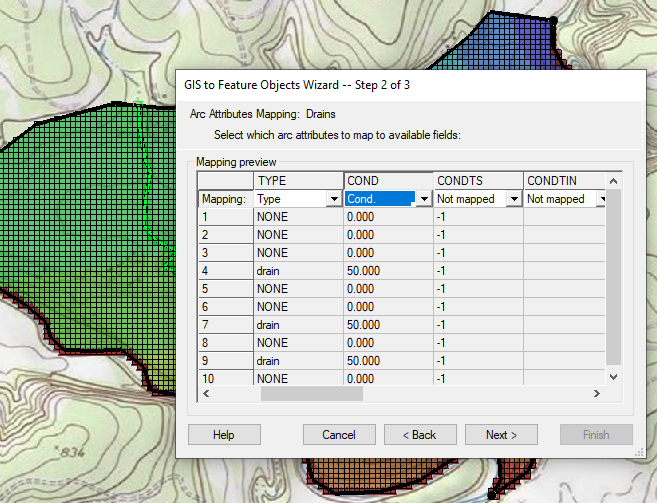
  6. In the second step of the wizard, make certain the Type and Conductivity columns are set correctly.
  7. Shapfile converstion to Drain feature objects
  8. After converting the shapefile to the map coverage, review the arcs and attributes. Clean up the coverage if needed.
  9. Finally, map the coverage to your MODFLOW model.

This workflow can be used for other MODFLOW attributes that are in shapefiles and need to be added to your MODFLOW project in GMS. For example, this workflow could be used to import a shapefile for wells, rivers, or other MODFLOW features. This workflow can also be used when importing MODFLOW projects into GMS where the MODFLOW project was created using other software.

Try out using shapefiles to import drain data into GMS today!

Blog tags: