Aquaveo & Water Resources Engineering News

Converting CAD Data to Feature Objects in WMS

CAD data has been around for a long time and it’s one of the most readily available formats for geological data. WMS can make use of the data in a variety of ways. One of these ways is to convert CAD data into feature objects.

When CAD data for an area is available, DWG and DXF file data can be automatically converted to feature objects in WMS. Lines, points, and polygons in the CAD file can be turned into feature objects on a Map coverage for use in your WMS projects. This is done by doing the following:

  1. Import the CAD data into WMS. It will appear in the Project Explorer.
  2. In the Project Explorer, right-click on the CAD file and select CAD to | Feature Objects.
  3. In the CAD → Feature Objects dialog, select the layers to be converted to feature objects.
  4. Next, in the Clean Options dialog, select options to clean up the feature objects such as removing dangling arcs.
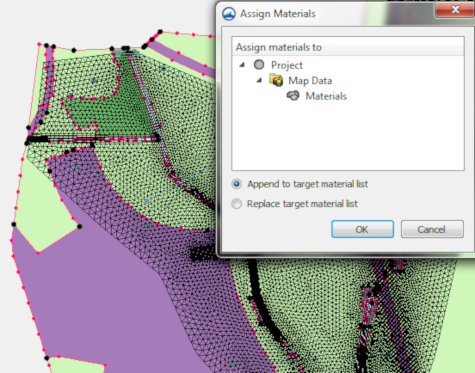
  5. Finally, the Properties dialog will appear letting you designate the type of coverage that will hold the new feature objects.

After you have converted your CAD data to feature objects, there are few items to keep in mind.

  • Typically, CAD data will not designate the stream direction. Make certain to check the direction of arcs generated from CAD data. Use the Reorder Streams command to fix this.
  • Polygons will not be automatically generated from polygons in the CAD data. Any enclosed arcs must be converted to polygons using the Build Polygons command.
  • It may be necessary to use the Clean Options dialog again after conversion.
  • Additional adjustments to the arcs may be necessary using the Map module tools.

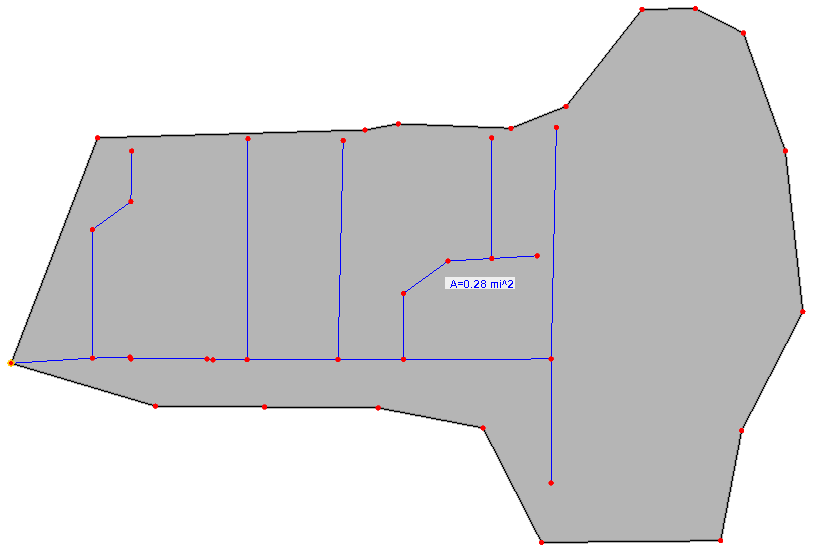
Generating feature arcs from CAD data can save you a lot of time and frustration when building your watershed model. Try out converting CAD data into feature objects using WMS today!

Blog tags: 

Moving SRH-2D Material Attributes to Another Project

After setting your SRH-2D material attributes in one SMS project, have you ever wanted to transfer those attributes to another SMS project? Doing this can save you from having to reenter the same material attributes into a separate project. You can even transfer multiple material coverages at once.

There are three project files referred to here: the original project, the project with the saved material coverage attributes, and the third project to which you want to add the saved material attributes. To make sure these instructions are clear, we'll call them Project A, Project B, and Project C, respectively.

To save time on other projects that use the same material attributes, you can use the following steps to export them for later use:

  1. Outside SMS, create a copy (Project B) of your project directory. This prevents you from accidentally damaging the original project (Project A) during the process.
  2. In Project B (the copy), delete any geometric data that isn’t going to be transferred, such as meshes, grids, GIS data, and scatter sets.
  3. Also remove any coverages and material data you do not want transferred.
  4. On the SRH-2D material coverages, remove any polygons and feature objects that you do not want transferred. This is assuming that the project receiving the new material parameters will be assigning the material properties to different polygons.
  5. This is the tricky part. You have to have at least one Map object for a map file to be saved in SMS. Therefore, create a new coverage of any type as a placeholder. Create a single feature point in this placeholder coverage.
  6. Use the Save command to save Project B that only contains the SRH-2D material coverages with your material properties, and one one other coverage with a single feature object.
  7. In another instance of SMS, open Project C.
  8. Use the Open command to open Project B.
  9. SMS should ask if you want to delete this data. If this happens, respond "No". The coverages from Project B (and its material lists and attributes) will be loaded into Project C.
  10. Now to add the material lists from the Project B into the material lists in Project C by right-clicking on the transferred coverage and selecting the Assign Materials to menu command. SMS will bring up the Assign Materials dialog where you can add materials from one coverage to another. You can either add the materials to the list of this coverage or replace the materials list in this coverage.

Now that you know how to transfer material parameters from one project to another, try it out in the SMS today!

Blog tags: 

Pages