WMS

Editing DEM Elevations

Do you have a Digital Elevation Model (DEM) that has elevations that need to be adjusted? Editing DEM elevations can sometimes prove difficult. However, with WMS you can edit the elevations of DEM files using several tools WMS provides for editing DEM elevations.

Here are a couple ways DEM elevations can be edited in WMS:

Editing Single Points

Some DEMs have a single point where the elevation is off. You can edit a single point in a DEM by using the Select DEM Points tool and selecting the point. You can then edit the point elevation by double-clicking on the point to bring up the DEM Point Attributes dialog where the elevation value can be changed.

Using Feature Arcs to Edit Elevation

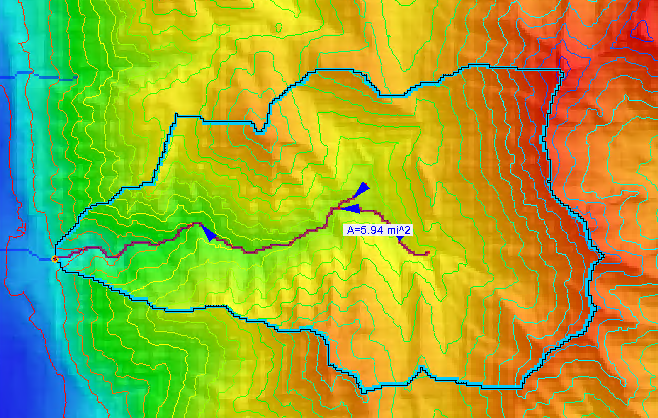
Sometimes, the elevation of a DEM needs to be adjusted to follow a specific line, such as a river bed or proposed irrigation channel. The elevation in this location can be adjusted using a feature arc. This is done by selecting the feature arc then right-clicking and selecting the Edit DEM Elevations command.

Editing DEM Elevation using an Arc

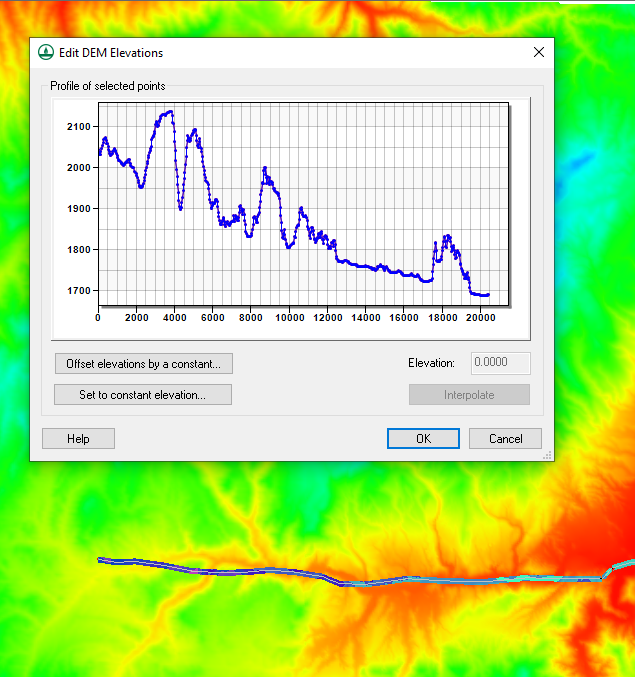
In the Edit DEM Elevations dialog, you can change the elevation of the DEM along the arc. This can be done by selecting and changing elevation points on the arc in the profile window. For editing all of the elevation values along the arc, the dialog provides the following options:

  • You can offset all of the arc elevations by using the Offset elevations by a constant button.
  • You can set all of the elevation values to a constant by using the Set to constant elevation button.
  • Finally, you can use the Interpolate button to interpolate the values to between the first and last values on the arc. This will smooth out the elevation to create an artificial slope.

Using these tools makes adjusting the elevations of DEMs easier. Try them out in WMS today!

Blog tags: 

Using Pre-Generated Polygons to Delineate a Basin

Delineating an accurate basin is an important part of a watershed project. WMS provides a number of tools for delineating a watershed basin. The Hydrologic Modeling Wizard is often used to step through the entire process of delineating a basin.

However, it is possible to delineate a basin using data from outside of the Hydrologic Modeling Wizard. In particular, the Drainage module contains tools for delineating a basin using existing project data.

For example, if you have a shapefile with polygons that gives the general outline of the basin, that shapefile can be used to delineate the basin. To use the shapefile polygons to delineate the basin, do the following:

  1. Import the shapefile into WMS. Verify the location is correct.
  2. If you have not already done so, add a DEM for the area of interest to the project.
  3. Generate the flow direction and accumulation, either by running TOPAZ/TauDEM or by importing it.
  4. Map the shapefile polygon(s) into feature polygons in a drainage type coverage.
  5. Place your outlet point(s) and digitize the streams. You can either manually draw the arcs, or load the streams from a shapefile. Be sure to verify that the arcs are set to Stream (not Generic) and that the directions are flowing from upstream to downstream (see "Stream Arrows" in the Drainage Display Options).
  6. Select DEM | Polygon Basin IDs -> DEM in the Drainage module.
  7. Select DEM | Compute Basin Data in the Drainage module.
Basin delineated from shapefile

Once you have a delineated basin, you can use the basin with the watershed modeling model of your choice. Be certain to review the basin to make certain it contains all of the area you need for your project.

WMS provides a large amount of flexibility in delineating a watershed basin in order to adapt to the needs of your project. Try out the different basin delineation tools in WMS today!

Blog tags: 

Troubleshooting TOPAZ and TauDEM in WMS

Both TOPAZ and TauDEM make computing flow directions and accumulations for basin delineation easier. One of these two programs is typically used during the process of delineating a watershed. During this process, it is not unusual to run into some issues. Below are some common issues and how to resolve them.

Missing DEM

DEM data is required to run TOPAZ or TauDEM. A DEM can be imported from a file or downloaded from a web service. If you get an error stating that no DEM exists after you have imported the DEM data, this is typically because the DEM was not imported correctly.

TOPAZ unable to find DEM

Often, the DEM has been imported as a raster file and is in the GIS data module. In order for TOPAZ or TauDEM to use this as a DEM it will need to be converted from a raster to a DEM using the Convert to | DEM right-click command in the GIS module.

Not Enough Data

In order for TOPAZ or TauDEM to work properly, a DEM is needed that has enough data to work with. When working on modeling very small areas, TOPAZ or TauDEM may fail to execute correctly because there is not enough data available to complete the process.

In order to fix this issue, it is recommended that you slightly expand the size of the area you are modeling. In particular, the resolution of the DEM being used may need to be increased. Use your best judgement as to how much additional data to add.

Too Much Data

The opposite of having too little data would be to have too much data which causes TOPAZ or TauDEM to slow down or stop running altogether. This typically happens when attempting to model a very large watershed. In this case, the issue typically isn’t related to problems with TOPAZ or TauDEM but is more likely related to the available processing power of the computer being used.

With many projects that have too much data, often much of that data is unnecessary. Often a lower resolution DEM can be used. When modeling a large watershed area, you should use your engineering judgement to find areas of greatest interest and then focus on those areas. If that is not possible, then you will need to find a way to increase your computer's processing power.

TOPAZ and TauDEM tools for delineating a basin. Try them out in WMS today!

Blog tags: 

Importing Land Use and Soil Type into WMS

Have you needed to obtain land use or soil type data for your WMS project? Land use, or land cover, data is used to define the land use or cover of areas in the watershed such as urban, forested, farm, etc. Soil type data is typically used to control the movement of water in a watershed model. Data for land use or soil type can be added to your watershed project in WMS by using files on your computer or by downloading the data from a database.

Import a File

Files containing land use or soil type data are often contained in a shapefile, though other formats are possible. This file can be imported from your computer using the File | Open command. Once imported, the shapefile will appear in the GIS Module. It will likely need to be converted to the map coverage before being used in your watershed model.

Import From Web

Land use or soil type data can be obtained from online web services. To access these services, do the following:

  1. Select File | Add Data | Get Data from Map.
  2. In the Virtual Earth Map Locator, select the location of your project. If your project already has a set projection, then the location of your project should already be visible.
  3. In the Data Service Options dialog, select one of the web services containing land use or soil type data such as the Land Use Shapefile, Statsgo Soil Type Shapefile, or Harmonized World Soil Database.
  4. Save the land use or soil type data to your computer. The data will automatically be imported into your project as a shapefile in the GIS Module.
Data Service Options dialog showing land use and soil type options
Moving Land Use and Soil Type Data

In most cases, having land use or soil type data on a shapefile will not include the data in your watershed model. Most often the data will need to be moved from the shapefile to the Map module. To do this:

  1. Create a map coverage with the Land Use or Soil Type property. Land use data should be placed on a land use coverage and soil type data should be placed on a soil type coverage. Data may be lost if the wrong coverage type is used.
  2. After creating the correct map coverage, select the land use or soil type shapefile in the GIS module then select the Mapping | Shape to Feature Object command.
  3. When using the GIS to Feature Objects Wizard, select correct map coverage and make certain all of the attributes are correctly assigned.

Once you have imported land use or soil type data and it has been correctly converted to the Map module, it is ready to be used in your watershed model. Try out using land use and soil type data in WMS today!

Blog tags: 

Pages